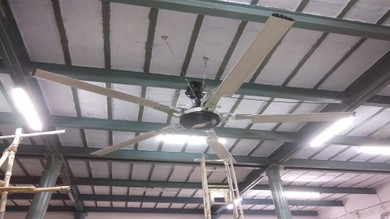
Proper professional installation is important for the total performance of the HVLS fans and for safety purposes. Following the installation procedures and instructions can avoid the installation mistakes, side effects and can increase its efficiency along with improving its reliability.
1) Distance
Distance always plays a vital role in the airflow. Improper selection of distance can reduce the airflow coverage area resulting in decreased efficiency. Installing fan too high or too low can will lead to improper distribution of the airflow leading to heating up the surroundings. So before installation knowing about the site feasibility and distance from the floor is the utmost criterion.
2.) Mounting Structure: I-Beam
Once you have verified the structure of the installation zone with respect to its load-bearing capability then, plan for installation of the fan. The method of installation varies based on the structures that are available for mounting. A structural engineer should verify that the structure is sufficient prior to fan installation. Verifying the stability of the mounting structure is the sole responsibility of the customer and/or end-user, and some HVLS Fan brands hereby expressly disclaim any liability arising therefrom or arising from the use of any materials or hardware other than those supplied by their company or otherwise specified in these installation instructions.
Fabrication of Epoch fan to I-beam is not recommended. The I-beam structure should be part of the structural frame. Without analyzing the frame structure fan shouldn’t be mounted directly to the I-beam
Installing the spacers depends on the thickness of the I-beam flange range. The mounting holes on the spacer are closer to one edge than the other. It is advised the edge of the spacer is facing the I-beam. Before beginning installation, confirm that you acknowledge the mounting roof pitch structure. Attach upper yoke (to I-beam). The flange width of the I-beam needs to be measured from which the fan will be hung.
3.) Hanging the Fan
Secure upper safety cable Wrap the safety cable around the mounting structure and secure the looped ends with the shackle. The cable must be drawn tightly around the I-beam or angle iron, leaving no strings swinging loosely as much as possible. The shackle should be on the top side of the I-beam or angle iron if possible. Securely tighten the shackle.
Attach extension tube (to upper yoke) fasten the extension tube to the upper yoke with the Extension Tube Hardware as shown. The tube must be oriented properly for effective drainage of water so that the slots on the bars between the extension tube flanges are facing downwards. Attach the lower yoke to the bottom of the extension tube with the Lower Yoke.
4.) Installing Guy Wires
- Attach locking carabineers to the main fan securely tighten the carabineers.
- Attach beam clamp Attach the beam clamp to the mounting structure.
- The torque applied to the nuts is also important as too much tightening will put extra stress of the wire leading to breakage.
- The width of the guy wire is also an important factor to sustain the weight of the blade.
Note:-
- A proper installation kit is a must to be provided to the service engineer.
- Safety equipment as per standards should also be granted.

